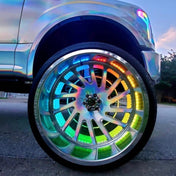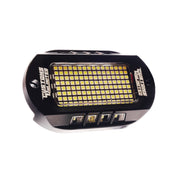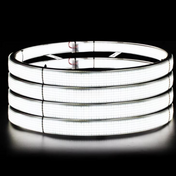
If you have a wring harness that has the sequential turn signal input wires (red, blue, and white single wires), you will need to splice the red and blue wire into the left and right turn signal + wires on the vehicle. You will need to research which wires these are or splice into a fuse.
White Braided Wire = DRL Input, all attached halos will turn white. When this wire receives power, the halos will turn white. Connect this to the vehicle DRL wire/fuse/signal if you intent to use this feature (optional).
Blue Braided Wire = Sequential Turn Signal Feature (1 Side) - If you connect this wire to the left turn signal, then you would connect the left side halos/DRL wires to the blue braided wire connectors on the wiring harness so they act as turn signals when the wire receives voltage.
Red Braided Wire = Sequential Turn Signal Feature (1 Side) - If you connect this wire to the right turn signal, then you would connect the right side halos/DRL wires to the red braided wire connectors on the wiring harness so they act as turn signals when the wire receives voltage.
BLUETOOTH APP: If your controller is a black box with a single 3-pin connector coming off of it, the app you need to download is Magic-LED Apple Link Android Link
If your controller is a white box with a single 3-pin connector coming off of it and says "LED Hue" on it, the app you need to download is LED Hue Apple Link Android Link
NOTE: PURE WHITE ON THIS CONTROLLER IS THE VERY BOTTOM SLIDER IN THE APP. THE TOP SLIDER IS FOR THE COLOR BRIGHTNESS. DECREASE THE TOP SLIDER ALL THE WAY AND INCREASE THE BOTTOM SLIDER FOR A PURE WHITE. IF YOU ARE USING COLORS, THEN DECREASE THE BOTTOM SLIDER ALL THE WAY.
After opening the app and connecting to the controller, please use the following settings:
Pixel/LED Type: SK6812_RGBW
Color Order: GRB
Pixel Count: 100 (This is the number of LEDs on the longest/largest component. You can increase/decrease this until the entire component is lit up)


Powering the Wiring Harness (Flow Series or RGBW)
The flow series wiring harness will now need to be connected to 12V+ and Ground/-. The wire with the inline fuse is the + wire, the other one without the inline fuse holder is -. You can connect these directly to the vehicles battery, but the harness will always be receiving power. This means that you will have to manually turn the halos/DRLs on and off every time you exit the vehicle. We recommend clipping the hoop connector off of the 12V+ wire and using an "add-a-fuse" or fuse tap and tapping the 12V+ power into a fuse that turns on/off with the vehicle or with a switch inside of the vehicle. All vehicles are different, so you will need to research or test which fuses are ignition-powered to do this. If you are going this route, then the ground/- wire will likely need to be connected to the frame ground nut that is located near the fuse box. It is a nut attached to the metal of the vehicle that the fuse box ground/- wires run to.

