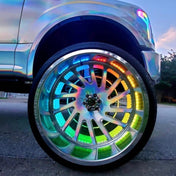
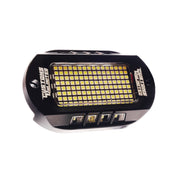
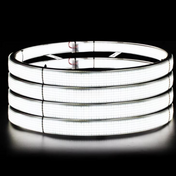
We appreciate your purchase of AutoLEDTech.com's 2015-2017 Ford Mustang Flow Series Color-Chasing DRL boards! Please follow the steps detailed below to properly install your replacement DRL boards.
Please note: Headlights must be opened before proceeding with installation. Professional installation is strongly recommended.
Tools Needed: Dremel Rotary Tool, Safety Glasses, 5-minute Epoxy, and Phillips Screwdriver
1. Remove the main bezel. Access the factory LED panels by removing the screws holding the DRL housing assembly (white bezel) in place. Once the screws are removed, pull the white bezel away from the headlamp housing.
2. Remove the black panel covering the factory driver board by taking out the screws. Pull the black panel out and remove the screws holding the factory driver in place. Pull the driver board up and unplug the wires from the factory boards, unplugging the DRL housing. If desired, you may leave the factory driver in place by replacing the screws.
3. Bring the DRL housing to a clean area. Remove the factory LED boards, by shaving down the plastic rivets holding the LED panels to the housing with a rotary (Dremel) tool. There is a rivet at the top and bottom of each panel. Panels should fall off.
4. Place the new Diode Dynamics LED boards into position. All holes should align perfectly. Due to the larger footprint of the new LEDs, the panels will not push down fully in place. One of the LEDs in each segment may be partially obstructed by the white housing. This is normal fitment, as intended.
5. Fix the new panels in place by applying epoxy or other permanent adhesive where the plastic rivets were shaved down. The epoxy should create a bond between the plastic rivet point and the board. Use enough epoxy so that there is a bond all the way around the rivet, contacting the board fully.
6. Once the epoxy is fully set, reinstall the black panel and white bezel to the main headlight housing using the original screws.
7. Connect the voltage regulator and wiring harness to 12V power and ground. This will dictate when the LED Boards turn on. The most popular wiring choices are listed in the table below. You can also connect them directly to the battery or 12V+ fuse post, but this means they will always receive power and will need to be manually turned on/off.
| Voltage | Pin OEM Connector | Wire Color-Driver |
Wire Color-Passenger
|
| 12V+ | DRL | White/Purple |
White/Purple
|
| 12V+ | Parking | Purple/White |
Purple/White
|
| Ground | Ground | Black/Grey |
Black/Grey
|
8. Mount the harness and controller and tuck all wires. The controller needs to be mounted in a position that avoids moisture or excessive heat. Test thoroughly, reseal headlights, and reinstall onto vehicle.

